Step 1: Plan the Area
Draw a plan of the area that you want to irrigate, to scale. This should include the house, boundaries, gardens, anything that may affect the irrigation process.
Detail the taps, water supply and where you would like the controller to be. You could use a title plan, google earth, google maps, or a landscaping plan as a basis for your plan. If you haven't got any of these available, drawing on graph paper is a great way to do it.

Step 2: How much water do you have?
Firstly choose the tap you would like to use, fill a bucket with the tap on full and time how long it takes to fill, turn this into litres per minute. A rule of thumb is to use a design flow that is half of what you have measured.
The above rule of thumb is not accurate and it is possible your water supply may not be able to supply 50% of your flow test at operating pressure. If you decide to use this rule of thumb it is advisable to test your biggest zone flow with the actual sprinklers to ensure it works before you install, so adjustments to your design can be made.
It is also likely you may be able to have bigger zones, so doing a proper pressure/flow test could easily pay for itself.

(60 / Time in seconds) x bucket size in litres
Lets say you filled your 10 litre bucket in 15 seconds.
Time = 15
Litres = 10
So through the equation we have 60 Divided by 15 = 4
4 x 10 = 40 litres per minute
Max L/pm for our irrigation is 50% of this therefore 20 L/pm
Step 4: Draw it up
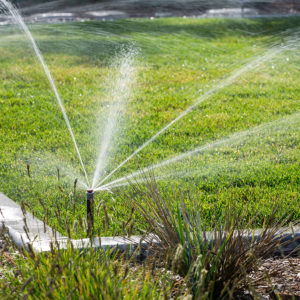
Draw on your plan the positions of the sprinklers, drippers, dripperline. You will need to understand what spacing to have these items at and you can read our sprinkler spacing details, or contact us and we can design it all for you.

Step 5: Break it down into zones
Write on your plan the flows of the outlets. You will now need to split your plan into irrigation zones. Your zones need to be split into the different types of irrigation types, sprinklers can not run in the same zone as drippers or dripperline, products with different water application rates should be on separate zones. Have a look at our zone split diagram.
Once you have zoned the area you will need to check that flow rates don't exceed your design flow. If it does you need to split your zones further so the total zone flow rate matches what the water supply is capable of, as per step 2.

Step 6: Draw in the pipeline
Pipe sizes, for town mains supply system is 19mm for sprinklers, and 13mm for drippers and drip line. 100 meters of drip line maximum (500 litres per hour). A pumped system you need to talk with one of our experts.
Draw in Pipelines to connect up your sprinklers in the zones that suit the flow you have available. The zone pipelines link back to the control valves (solenoid valves), these are located normally close to the water supply but can be spread out around your garden and feed by a mainline pipe.
See our pipeline layout.

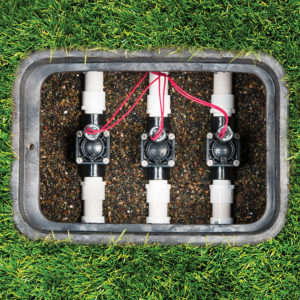
Step 7: Valve Layout
Add your valves into your system, consider what is the best location for ease of access. Most systems you should group all the valves together closes to the tap connection, however if there is good savings in pipe to spread them out through the system and take wiring from the controller, this works well to.

Step 8: Landscape controller options
Choosing a controller is not easy because there is so many to choose from.
First thing you need to do is design your system and have an idea of what extensions might happen in the future.
Then decide if there will be power at the site, it is always cheaper to have a powered controller as the solenoid valves are a lot cheaper, half the cost in the 25mm size.
Then with the knowledge of how many valves you want to operate, battery or mains powered, indoor or outdoor, wifi cloud-based and what sensors and features you might need. Below are the main options we see in domestic irrigation systems and have a read of our "How to Choose a Controller" Guide for more information
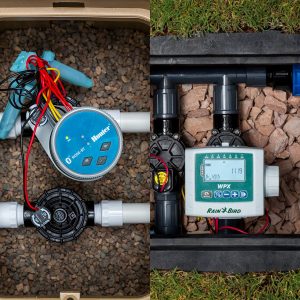

Take a look at our Residential Controller Product Category for all the recommended controllers for a standard home.

Orbit Tap Timer
You can go for an Orbit tap timer but these are restricted to flow of 1000 litres per hour, but are the cheapest option in many situations.

Hunter XC Controllers
The Hunter XC indoor and XC outdoor controllers are our biggest sellers, the price and quality is hard to pass by. The features they have take care of nearly every landscape system we come across, except they are not wifi capable.

Hunter XCH & Nodes
The Hunter XCH and node controllers are the go to for battery operated controllers, the node is great if you do not have a wall or fence to attach a controller to.

Pro C Controllers
For the next level up the Pro C controllers if you have more than 8 valves and require some extra features.

Wifi Controllers
Then there are wifi controllers, Hydrawise and Skydrop, these are varying features that you will need to understand what suits you the most.