How to Install a Pop Up Sprinkler
Pop-Up sprinklers are the most popular application for residential lawns. In this guide, we will give you the tips on how to install the pop-up sprinkler and why we use them.
Here you can see our recommended category for lawn pop-ups. These products are our most common in both commercial and residential lawns.
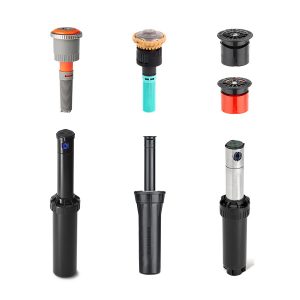
Pop-Up sprinklers are a disguised and effective way to keep your lawn beautiful and alive. The sprinkler is buried below ground, with only the head shown. The head is flush with the soil, below the grass. Once popped up, the sprinkler's stem rises above the grass to irrigate.
This strip of grass below will be our example. Below you'll see the correct fittings required to install the pop-up sprinkler.

Installation
Tips
- The top face of the sprinkler should be flush with the soil
- Make sure the sprinkler is installed vertically, else risk uneven watering
- Use the same trench dug for the pipe to lay the straight through pop-ups to save time
- Standard lawn pop-ups are 15mm BSP inlet (Gear rotor sprinklers will be larger)
- Use the swing joints to get closer to walls/fences and corners.
- If the pressure is too high you will see the sprinkler mist. (may need to install the pressure regulating body/PRS30 or 40)

Straight Line Example
- A female threaded tee is used in a straight line situation when you want to continue the zone/pipe to run to more sprinklers.
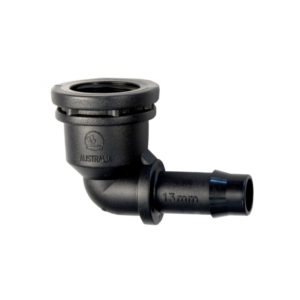
End of Line Example
- A female threaded elbow is used at the end of the line to finish off the zone/pipe.

- It is recommended to dig the trench 200mm out from the edge (easier to dig when digging by hand as well), allows you to get closer to the corner.
- The sprinkler should be around 30mm to 50mm away from the deck/edging. This allows for tools to be used behind (weed whacker) as well as the grass to grow behind and disguise the sprinkler.
- When sprinklers are too close to the edge of a path or deck, the grass can die around the sprinkler, due to the roots not getting a proper footing.
- Trench Depth should be around 200mm deep, this depends on the site (using swing joints allows for adjustable sprinkler height, allowing for a flexible trench depth)
- Unless your sprinkler is under pressure you will not need thread tape.
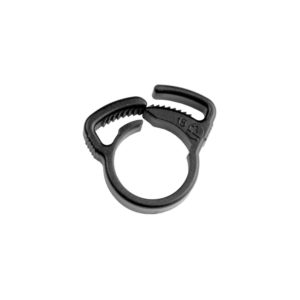
- Ratchet Clips are advised on all lateral fittings.
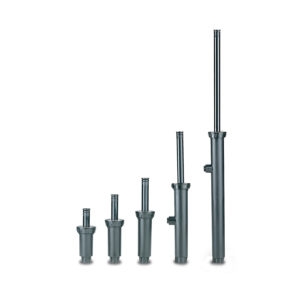
Sprinkler Bodies
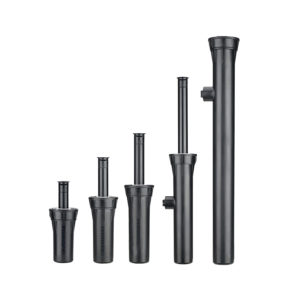
The pop-up bodies are effectively the same from either Rain Bird or Hunter. The pop-up bodies are referred to by the height of the stem that rises above the grass: the most popular being 100mm or 4-inches.
Stem Height Options
- 50mm
- 80mm
- 100mm (Standard for lawns)
- 150mm
- 300mm
The 150mm and 300mm are handy if you need to rise above a step or low plants. These sprinkler bodies being longer, have a side BSP inlet at the same height as the 100mm, allowing you not to have to bury the pipe deeper for the larger bodies. (In doing the side entry, the check valve/Seal-o-Matic will no longer function)
A benefit to the broad face of the body prevents the sprinkler from shifting from vertical when nudged. Compared to some of the other bodies available, like the PS Ultras that can be susceptible to this.
Tips
- Pack the sides of the pop-up body tightly on installation, to ensure it doesn't move from the vertical
- Where sprinklers are installed on sloping terrain, the lowest sprinkler will always weep water until the system drains, Check valves can be used to solve the problem (pre-installed or aftermarket)
- Broader face = less likely to move
- When changing sprinkler nozzles, make sure the riser has a male thread outlet.
- Rainbird and Hunter Nozzles both have 10mm female threads. (Toro nozzles are male)

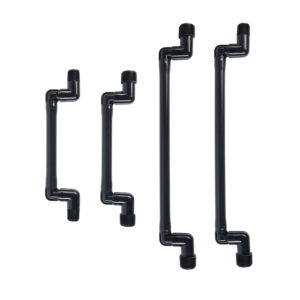
Swing Joint
A common issue that people have with pop up sprinklers is if someone steps too hard on the top of the sprinkler, or a vehicle drives over, it can break the fittings underneath if installed directly onto lateral pipe. The swing joint is designed to combat this issue, giving the sprinkler some flexibility when pressure is applied above. Digging up the pipe to fix a broken fitting is a significant pain, so having a swing joint is recommended. When wanting to raise or lower the sprinkler a connection directly to the lateral pipe will not allow it.
Perfect for getting close to corners or tight spots where the pipe cant reach.
Sizes:
- 150mm Length - 15mm BSP Threads
- 300mm Length - 15mm BSP Threads
- 300mm Length - 1 x 15mm, 1 x 20mm BSP Threads
- 300mm Length - 20mm BSP Threads
Tips:
- When cutting the pipe for the sprinkler position, it will not be where the sprinkler is, rather 150mm or 300mm to either side. (see top view example below)
- Sprinkler can be located parallel to the lateral pipe, or anywhere up to right angle.
- It takes less time to install with swing joints than without.


Products Used
-
Hunter Pro Spray Pop up Sprinkler Bodies
$6.52 – $39.84 Select options -
Hunter Pop-up Sprinkler Swing Joints
$6.21 – $7.76 Select options -
Antelco Female Threaded Elbow
$1.52 – $3.42 Select options -

Antelco Female Threaded Tee
$2.00 – $4.46 Select options -
Antelco Plastic Ratchet Clips
$0.20 – $0.45 Select options -
Rain Bird 1800 Series Pop-Up Sprinkler Bodies
$4.68 – $46.58 Select options